Introduction: Why Make Cornetto at Home?

Who doesn’t love a perfect Cornetto—crispy, creamy, and topped with that irresistible crunchy chocolate tip? It’s the ultimate indulgence on a hot summer day, or the perfect treat to satisfy your sweet tooth any time of the year. But have you ever thought about making your own Cornetto at home? If you’ve ever craved the taste of your favorite ice cream cone, but couldn’t find the exact flavor or topping you wanted, making your own Cornetto could be the answer.
Making Cornetto at home isn’t just about control over the flavors; it’s about crafting a treat that’s tailored exactly to your taste. The benefits? You can experiment with different ice cream flavors, customize the toppings, and even create the perfect crunchy chocolate tip that so many Cornetto fans adore. Let’s dive into the essential steps that will help you create the perfect Cornetto at home.
Essential Ingredients for a Perfect Cornetto
Before diving into the step-by-step process, it’s important to understand the ingredients you’ll need to make your Cornetto truly special. While Cornetto cones are usually simple, the right ingredients will elevate your homemade version to a whole new level.
Ice Cream Flavors
One of the best parts about making Cornetto at home is the ability to customize your ice cream flavor. Some of the most popular Cornetto flavors include:
- Vanilla: The classic and creamy flavor, which pairs well with any topping or cone.
- Chocolate: Rich and indulgent, perfect for chocolate lovers.
- Hazelnut: A nutty and smooth flavor, often found in Cornetto’s signature cones.
- Tip: Feel free to get creative with other flavors like strawberry, caramel, or even custom flavors like coffee or pistachio.
Cone Options
You can either use store-bought wafer cones or opt to make your own for a more authentic experience.
- Store-bought Cones: Quick and convenient, but be sure to choose high-quality cones to avoid a soggy texture.
- Homemade Cones: Making your own cones allows you to control the texture and flavor of the cone. Plus, you can shape them just like the iconic Cornetto.
Chocolate Coating
The signature feature of any Cornetto is the crunchy chocolate tip. Here’s how you can make your own:
- Use dark chocolate or milk chocolate, depending on your preference.
- To create that perfect crunch, melt the chocolate and dip the top of the cone in it.
- Pro Tip: Add some crushed nuts or sprinkles on top of the melted chocolate for extra texture.
Optional Toppings
Why stop at just ice cream and chocolate? Adding creative toppings is what will make your homemade Cornetto shine:
- Crushed nuts: Almonds, hazelnuts, or peanuts add a delightful crunch.
- Sprinkles: Colorful sprinkles or chocolate shavings make for a fun, festive touch.
- Caramel sauce: Drizzle a little caramel sauce for a rich, sweet flavor.
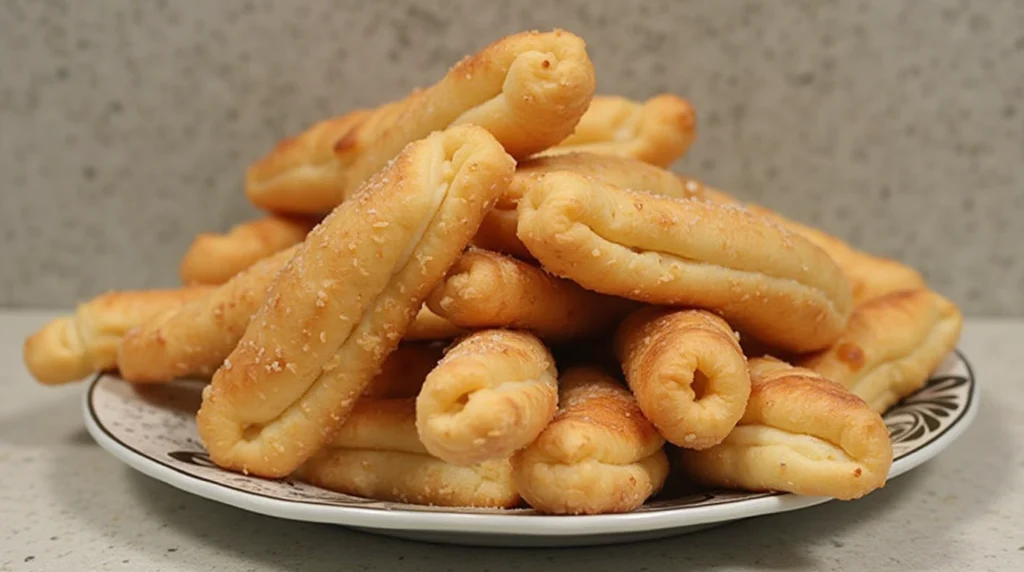
How to Make the Homemade Cornetto Cone
The cone is just as important as the ice cream itself. Here’s how to make the perfect cone at home.
Making the Cone: Step-by-Step Guide
Making homemade cones requires a few simple ingredients and some patience. Here’s how you can do it:
- Ingredients:
- 1 cup flour
- 1/2 cup sugar
- 1/4 cup melted butter
- 1/4 cup milk
- 1/2 teaspoon vanilla extract
- A pinch of salt
- Instructions:
- In a bowl, mix all the ingredients together to form a smooth batter.
- Heat a waffle iron or non-stick frying pan, and pour a small amount of the batter into the center.
- Cook for 2-3 minutes until golden brown and crispy.
- While still warm, shape the cone using a cone mold or carefully by hand.
How to Shape the Cone
- Cone Mold: If you have a cone mold, simply wrap the warm waffle around it to shape it into a cone.
- DIY Method: If you don’t have a mold, you can wrap the cone around a wooden spoon handle or a clean metal rod.
Alternative Cone Options
- If you’re short on time or want a quicker option, store-bought cones will work just fine.
- Make sure to choose wafer cones that are thick enough to hold the ice cream without getting soggy.

Step-by-Step Guide to Assembling Your Cornetto
Once your cones are ready, it’s time to assemble your Cornetto.
Layering Ice Cream and Chocolate
- Ice Cream Base: Start by filling your cone with a scoop of your favorite ice cream. Pack it down a bit to make room for the toppings.
- Chocolate Coating: Dip the top of the cone into melted chocolate. Let it set for a few seconds, so the chocolate hardens and creates that signature crunchy tip.
Adding the Toppings
Once the chocolate has set, it’s time to get creative:
- Add crushed nuts, sprinkles, or even a drizzle of caramel sauce to the top for extra flavor and texture.
Freezing Your Cornetto
- After assembling your Cornetto, place it in the freezer for about 30-45 minutes to firm up the ice cream.
- Tip: Make sure the chocolate coating has fully hardened before freezing.
Tips for Perfecting Your Homemade Cornetto
To make sure your homemade Cornetto rivals the store-bought ones, here are a few pro tips.
Ensuring the Right Texture
- Ice Cream Consistency: Make sure the ice cream isn’t too soft when filling the cone. If it’s too runny, it can melt and create a soggy cone.
- Cone Crispiness: If you’re using homemade cones, ensure they’re fully cooled before adding ice cream. This will help maintain their crispness.
Flavor Combinations
Experiment with different flavor combinations to create a custom Cornetto that suits your taste.
- Vanilla ice cream with chocolate coating and crushed hazelnuts.
- Strawberry ice cream with dark chocolate and sprinkles.
Pro Tips for a Chocolatey Crunch
- To achieve that signature chocolate crunch at the top, you can also freeze the cones upside down for a few minutes to help the chocolate harden quickly.
Enjoying Your Cornetto: Serving and Storing
Once your Cornetto is made, it’s time to enjoy it!
How to Serve
- Serve your homemade Cornetto as a fun family treat, at a party, or just as a personal indulgence. You can even offer a variety of toppings for a DIY Cornetto bar.
Storing Cornetto
- Freezing: Store your Cornetto in the freezer in an airtight container. Make sure the cones are fully frozen before stacking them.
- Freshness: For best results, enjoy your Cornetto within 1-2 weeks.
Creative Variations
- Try different ice cream fillings, such as sorbet or frozen yogurt, for a healthier twist.
- Experiment with toppings like caramelized almonds, whipped cream, or even a drizzle of chocolate syrup for added indulgence.
Additional Tips for Customizing Your Cornetto
Once you’ve mastered the basics of making a Cornetto at home, it’s time to get creative! There are many ways to personalize your Cornetto to suit your tastes or impress your friends.
Flavor Variations
While the classic vanilla, chocolate, and hazelnut options are popular, there’s no limit to the flavors you can experiment with:
- Fruity Flavors: Think tropical—mango, passion fruit, or even berry blends like raspberry or blueberry. You can swirl different fruit purees into the ice cream base for added flavor and texture.
- Nutty Flavors: A creamy pistachio or almond ice cream works well in Cornetto cones. You can even add chopped nuts into the ice cream for an extra crunch.
- Chocolate Lovers’ Cornetto: For true chocolate lovers, try a chocolate ice cream base, paired with a chocolate-covered cone, and topped with mini chocolate chips or chocolate shavings.
Alternative Ice Cream Bases
You don’t have to stick to traditional dairy ice cream! For a twist, consider the following alternatives:
- Frozen Yogurt: A lighter and tangier option that pairs well with fruit or granola toppings.
- Vegan Ice Cream: Use coconut, almond, or oat milk-based ice cream for a vegan-friendly Cornetto.
- Sorbet: For a dairy-free, refreshing treat, sorbet is an excellent option. Try citrus flavors like lemon, lime, or orange for a refreshing contrast to the chocolate tip.
Creating a Perfect Layered Effect
- Layered Ice Cream Flavors: If you’re feeling adventurous, why not layer different ice cream flavors inside your cone? Create a “Neapolitan” effect with vanilla, chocolate, and strawberry ice cream stacked in each cone. You can also layer your ice cream with a bit of fruit jam or chocolate sauce for extra indulgence.
- Swirling Sauces: Swirl caramel, fudge, or even peanut butter sauce into the ice cream before it freezes for a fun texture and flavor contrast.

Troubleshooting Common Cornetto-Making Mistakes
Making Cornetto cones at home is not always a perfect science, especially if it’s your first time. Here are some common issues you might encounter and how to fix them:
Soggy Cone Problem
- Cause: If your cone gets soggy, it’s likely because the ice cream is too soft when filling the cone.
- Solution: Be sure the ice cream is firm and not overly soft. Also, let the cone cool completely before filling it with ice cream. Consider freezing the cone for a few minutes before adding the ice cream.
Chocolate Doesn’t Harden Properly
- Cause: If the chocolate doesn’t form a solid coating on the top of the cone, it might be due to the chocolate being too hot or not being cooled properly.
- Solution: Allow the melted chocolate to cool slightly before dipping. Also, ensure your cones are fully chilled before dipping them in chocolate. Freezing the cone right after dipping helps the chocolate set faster.
Ice Cream Melting During Assembly
- Cause: If your ice cream is melting too quickly while you’re assembling, it could be because the environment is too warm.
- Solution: Work in a cool kitchen and assemble the cones quickly. You can also place the cone in the freezer briefly before adding the toppings to keep the ice cream at the right texture.
Creative Cornetto Variations for Special Occasions
Why not make your Cornetto even more exciting by customizing it for different occasions? Here are a few ideas for themed Cornettos:
Holiday-Themed Cornettos
- Christmas Cornetto: Use peppermint ice cream, a sprinkle of crushed candy canes, and red and green sprinkles for a festive treat.
- Valentine’s Day Cornetto: Strawberry ice cream with a drizzle of white chocolate and heart-shaped sprinkles.
- Halloween Cornetto: Orange sherbet ice cream, topped with mini marshmallows and chocolate “spider webs” for a spooky twist.
Party Cornettos
Make your Cornetto a party favorite by creating a build-your-own Cornetto bar. Set out different ice cream flavors, toppings (crushed cookies, mini candies, sprinkles), and sauces (chocolate, caramel, or fruit syrups) so guests can customize their own creations.
Storing Your Homemade Cornetto Cones for Long-Term Enjoyment
Sometimes, you might make too many Cornettos to finish in one sitting. Don’t worry—here’s how to store them properly for future enjoyment.
Freezing Cornetto Cones
- After assembling your Cornetto, ensure it is fully frozen before storing. Place your cones on a tray with parchment paper and freeze them for at least 3 hours to prevent them from sticking together.
- Once frozen, wrap each cone tightly in plastic wrap or place it in an airtight container to prevent freezer burn.
How Long Can You Store Homemade Cornetto Cones?
- Homemade Cornetto cones are best enjoyed within 2-3 weeks for the best taste and texture. After this time, the ice cream may lose its creamy consistency, and the cone may become less crispy.
Defrosting Before Serving
If you’ve frozen your Cornetto for a while, let it sit at room temperature for a few minutes before eating to ensure it’s not too hard to bite into.
Exploring the History of Cornetto and Its Cultural Impact
Understanding the origins of the Cornetto adds a special touch to the enjoyment of this classic treat. Here’s a glimpse into its history:
The Origins of Cornetto
- The Italian Roots: Cornetto was introduced by Baron Franz von der Heydt in the early 1950s in Italy, under the brand Magnum by Unilever. It quickly became a popular choice in Italy before spreading across Europe and the rest of the world.
- Modern-Day Popularity: Today, Cornetto is not just a snack; it’s a cultural phenomenon, often associated with summer days, family gatherings, and joyful moments. The distinctive cone, creamy ice cream, and crunchy chocolate tip are beloved by people of all ages.
Conclusion:
Now that you know exactly how to make it at home, it’s time to grab your ingredients and start experimenting with flavors, toppings, and cones. Whether you’re crafting a classic version with vanilla ice cream or going for a creative, festive twist, making your own one will always bring joy to your kitchen.
By making this delicious dessert from scratch, you’ll not only enjoy a sweet treat that’s tailored to your taste but also gain a sense of pride and accomplishment. Share the joy with family and friends, or make it your go-to dessert for any special occasion!
Call to Action: Now that you’re ready to create your perfect Cornetto, share your homemade creations with your friends or on social media. Use the hashtag #HomemadeCornetto and inspire others to join you in crafting their own perfect cones. Don’t forget to experiment with new flavors and toppings—it’s your creation!
FAQ: Everything You Need to Know
1. How do I store my homemade dish?
- Answer: Wrap it tightly in plastic wrap or place it in an airtight container. Keep it in the freezer, and it will stay fresh for up to a week. If you’ve used homemade cones, make sure they are properly cooled before storing.
2. Can I make it ahead of time?
- Answer: Yes, you can prepare it in advance! Assemble the cones and place them in the freezer to set. You can store them for up to a week and enjoy them whenever you like.
3. How do I get the chocolate tip to stay crunchy?
- Answer: To get that signature crunchy chocolate tip, ensure that you use high-quality chocolate and freeze the cones immediately after dipping. The colder the cone, the firmer the chocolate will become, creating that satisfying crunch.
4. Can I make a vegan Cornetto?
- Answer: Absolutely! Use dairy-free ice cream (like coconut or almond milk-based varieties) and replace the cone with a vegan-friendly option. For the chocolate coating, opt for dairy-free chocolate.